Skip to content

Exercises 1 - Foundations

In the following exercises, you'll need to reproduce in Typst the image you see. You can freely use the official Typst documentation.

1 - Basics

Example document with the heading "My first Typst document" and a sentence about loving cookies

  • Headings are made using the = symbol
  • Paragraphs can be written directly, like in Markdown
== My first Typst document

My name is Joseph, and I love cookies

2 - A first shape

Solid blue circle

  • Call the circle() function with a #
  • Use fill and width arguments
#circle(fill: rgb("#3a86ff"), width: 2.5cm)

3 - Layout with stack
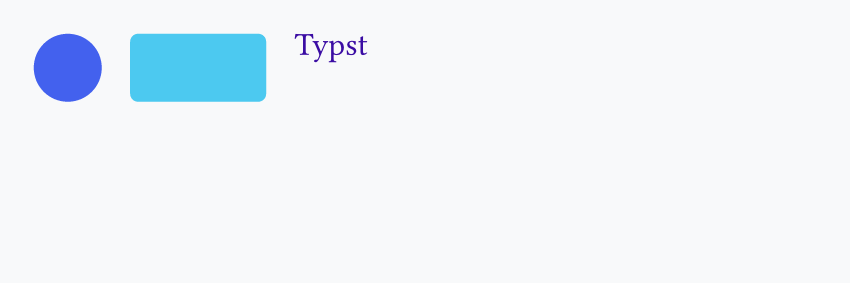
Row with a blue circle, a rounded cyan rectangle, and purple "Typst" text

  • Use stack() with dir: ltr
  • Add spacing between elements
  • Put a circle(), a rect(), and a text() inside
  • Look at the radius argument in rect() and the size argument in text()
#stack(
  dir: ltr,
  spacing: 0.5cm,
  circle(fill: rgb("#4361ee"), width: 1.2cm),
  rect(fill: rgb("#4cc9f0"), width: 2.4cm, height: 1.2cm, radius: 4pt),
  text(fill: rgb("#3a0ca3"), size: 16pt, "Typst"),
)

4 - Variables and set rules

Weekly report heading and sentence in orange above a matching orange rounded bar

  • Define the main color (#e76f51) with #let
  • Use #set text(...) to style all text at once
#let main-color = rgb("#e76f51")
#set text(fill: main-color)

== Weekly report

Everything uses the same text color.

#rect(fill: main-color, width: 4.5cm, height: 0.5cm, radius: 3pt)


Question

Having questions? Feedback? Feel free to ask!